DIY Car Maintenance

Amazing. I am always in admiration of guys that can do that kind of deduction.

Also, a great example of "simplest answer is usually the right one"
What's also interesting to me is the mechanic who didn't even look under the car when a problem was reported, excessive heat, that had to be coming from the engine or exhaust system. He took like an hour out of his day to drive around with me, so it wasn't that he refused to spend the time.

Reminds me of the scene from Sling Blade where the retard finds the problem with the lawnmower, which is also reminiscent of the video mountainaire posted about the old Camaro not running right because the gas had deteriorated. Simplest things first.

 
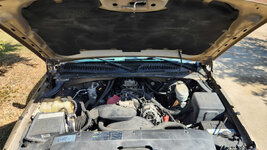
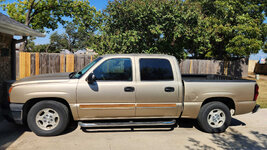
I began changing the knock sensor in the 2004 Chevy Silverado 1500 with 176,000 miles. While I'm there, I'm also going to change the spark plugs, wires and oil sensor, which has been stuck at the highest reading for years. All of this is in hopes of being able to pass emissions and keep the truck in good running order.

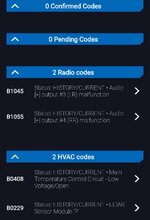
Currently, the only code that would prevent passing emissions is the P0332 Knock/Combustion Vibration Sensor 2 Circuit Low Bank 2. This BlueDriver scanner can simulate an emissions test and it also says that the truck's EVAP has not fully self-tested, which was one of the codes that I cleared last week. I've driven it about 100 miles since then, so I'm not sure how long it will take in order to know if there's a problem with the EVAP, but that's not a difficult fix if it's needed.

1760723608664.jpeg

I'm following this video step-by-step that was made by BlueDriver, the company who made my code scanner. They also provide a written guide with a list of the required tools.


20251016_131759.jpg


From the BlueDriver Silverado Playlist said:
Knock Sensor – 1999-2006 Chevy Silverado

Required Tools
• 8mm, 10mm, & 22mm sockets
• Socket wrench
• Flat head screwdriver
• 3/8 inch extensions
• Vice grips
• Hose clamp pliers
• Torque wrench
• Rags
• Fuel line release tool 3/8"

General Repair Steps
1. Open the main Fuse Box (located under the hood on the driver’s side).
2. Using the guide on the underside of the cover, locate and remove the Fuel Pump Fuse.
3. Start the engine and wait for it to stall.
4. Using a screwdriver (or pick), press the pin inside the fuel valve (located under the engine cover on the passenger side), and release any remaining fuel onto a rag.
5. Loosen 8mm bolt on top of Engine Cover, and remove cover.
6. Loosen 8mm bolts on hose clamps at either end of Outlet Ducting.
7. Remove the Radiator Hose and Throttle Body Coolant Lines from the clips on the bottom of the Outlet Ducting.
8. Remove the Outlet Ducting and put it aside.
9. Optional: Use hose clamps (or a vice grip with a rag around it) to pinch off the coolant line running into the Throttle Body.
10. Loosen the hose clamps on the coolant lines running into the Throttle Body and remove the lines (put down a rag first to catch any spilling coolant).
11. Remove the connector from the side of the Throttle Body.
12. Remove the hose from the rear of the Throttle Body.
13. Loosen the three 10mm bolts on the plastic cover on top of the intake near the cab, and then remove the cover.
14. Using some compressed air, blow some air around the base of the Intake Manifold, where it meets the block. This is to ensure no debris gets into the engine when the manifold is removed.
15. Unplug all eight Fuel Injectors (four on each side of the manifold).
16. Loosen all ten 8mm bolts on the Intake Manifold, and remove them.
17. Unplug the MAP sensor at the top rear of the Intake Manifold.
18. Disconnect the two clips hold down the Wiring Harness that runs over top of the manifold.
19. Unplug the Alternator, EVAP line, and EVAP connector.
20. Remove the 10mm nut from the Wiring Harness clamp on top of the manifold near the Throttle Body, and then push the wiring harness to the side.
21. Loosen the hose clamp on the Vacuum Line running to the Brake Booster, and then remove the hose.
22. Unplug the PCV line (on top of the manifold about midway back).
23. Unplug the Knock Sensor, and then remove the sensor clip from the Intake Manifold.
24. Using a fuel line release tool, remove the Fuel Line (located on the driver’s side of the manifold) from the manifold. Put a rag underneath the Fuel Line to catch any remaining fuel.
25. Take the EVAP line, run it back under the Fuel Line, and then push it to the side.
26. Remove the Intake Manifold from the engine bay (keeping an eye out for any leaking coolant or fuel)
27. Stuff some rags into the top of the eight Intake Ports to ensure nothing falls into them.
28. Pull up on the rubber plug above the Knock Sensor, and unplug the Knock Sensor connector. There are two Knock Sensors; you may want to replace both at the same time.
29. Using a 22mm socket, loosen and remove the Knock Sensor(s).
30. Screw the new Knock Sensor(s) in by hand.
31. Torque the Knock Sensor(s) to 15 foot-pounds.
32. Replace the Knock Sensor connector(s) and plug(s).
33. Remove the rags from the Intake Ports (being careful nothing falls into them).
34. Clean the intake mating surface.
35. Optional (but recommended by Chevrolet): replace Intake Manifold Gaskets.
36. Put the Intake Manifold back into place.
37. Put some Loctite 242 (Blue, medium strength) on the threads of all ten 8mm manifold bolts, and then put the bolts into place finger tight.
38. Torque the 8mm bolts following the order shown below. This is a two stage process. First round, torque the bolts to 44 inch-pounds, second round, torque to 89 inch-pounds.
39. Pull EVAP line under Fuel Line and back into place, and reconnect it.
40. Reconnect PCV hose.
41. Reconnect Vacuum Line to Break Booster.
42. Plug the EVAP connector and Alternator connector back in.
43. Put the Wiring Harness back into place, and secure the clamp using the 10mm nut.
44. Close both clips on the Wiring Harness.
45. Put the Knock Sensor connector back into place, and plug it in.
46. Reconnect the MAP sensor.
47. Plug all eight Fuel Injectors back in (tabs face toward rear on driver’s side, and toward the front on the passenger side).
48. Replace the cover near the top rear of the manifold, and tighten the three 10mm bolts.
49. Reconnect the Fuel Line (making sure to replace the metal clip that secures it to the manifold side).
50. Reconnect the hose on the rear of the Throttle Body.
51. Plug in the Throttle Body connector.
52. Reconnect the Throttle Body coolant line.
53. Put the Outlet Ducting back into place, and reconnect the Throttle Body coolant line and Radiator Hose to the underside of the Outlet Ducting.
54. Slide the Outlet Ducting back onto the Throttle Body and Mass Airflow Sensor.
55. Tighten the 10mm bolts on the Outlet Ducting hose clamps.
56. Replace the engine cover, and tighten the 8mm bolt at the top.

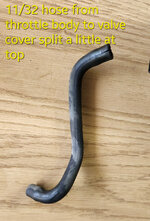
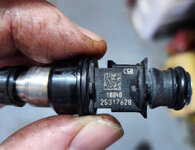
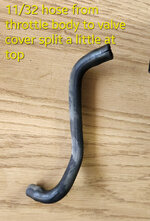
Removing the intake manifold was a lot of little things, but nothing more difficult than prying old hoses off their fittings and unclipping tough to access fuel injector connectors. I ran into an 11/32" hose that cracked at one end. I'm going to replace it either now or maybe later since it's easily accessible. I hate to spend the money for a dealer part so I could just use generic hose that isn't shaped perfectly.

20251016_150016.jpg

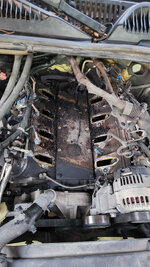
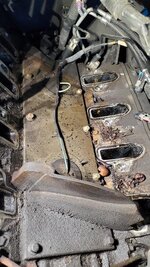
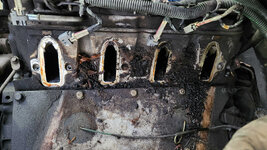
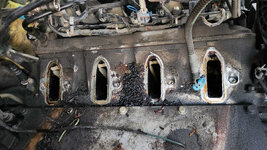
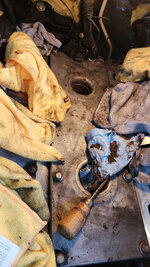
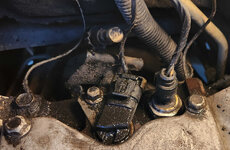
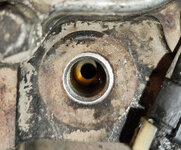
I discovered that underneath the intake manifold it was quite dirty, including a lot of mouse shit. The truck used to live in the country, but it was driven pretty much every day, so I'm a little surprised there's so much in there. Now it lives in the city so, after cleaning that area, I don't expect this to happen again.

20251016_184505.jpg

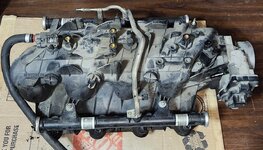
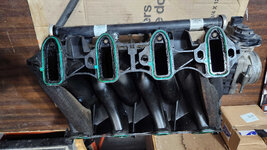
Not my truck but a 2002 Suburban intake that I found online. It's also kind of dirty, but not as bad as mine, picture below:

1760722709712.jpeg

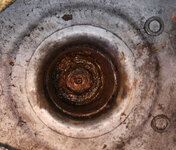
Passenger bank on my 2004 Chevy Silverado, picture below:

20251016_184512.jpg

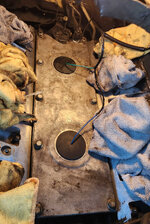
Driver side bank on my 2004 Chevy Silverado, picture below:

20251016_184517.jpg

I'm changing both knock sensors at $53 each from Rock Auto (dealer price is $135 each) even though there's only a code for one of the sensors/banks. Considering the length of this job and the age of the truck, I thought it made sense to do both now.

20251016_185526.jpg

I'll replace the intake manifold gaskets for $43 ($154 from the dealer with no extra pieces or $84 for the ACDelco part at Rock Auto), which is an after market kit that includes fuel injector O-rings.

20251016_185616.jpg

20251016_185628.jpg
 
^ Truck looks in good shape, those are worth keeping.

Be careful with that mess on the engine and the exposed intake ports. Some of the intake valves will be open, you don't want that crud falling into a cylinder. I'd vacuum it up with a shop vac, and plug the ports with shop towels before doing anything else.

Now is also a good time to clean the sludge out of the throttle body, and intake manifold, and making sure the pcv system is good.
Thankfully, the step-by-step video gave me the exact same advice, so I plugged the intakes with fresh shop towels, vacuumed the big stuff, and have been scrubbing the smaller stuff today.

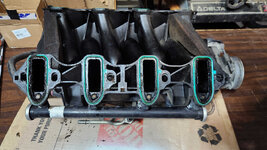
Also been cleaning the intake manifold in preparation for the new seals. It wasn't that dirty at all, just a little dusty on top and a little grease around the seals.

Thanks for the tip on the PCV; I hadn't thought about blowing that out.

Do you suggest I remove the throttle body or just clean it while it's bolted onto the intake manifold? I think I'd probably change the throttle body gasket if I removed it, which is only around $10 after market.
 
This seems like the appropriate spot...

Anyone ever get a Technical Service Bulletin (TSB) issue covered when the vehicle is out of warranty ? And if so, how did you approach the service department to get that done ?

I bought a new car in 2021. 6 year/72K mile warranty. Mileage is well over the 72K, more than twice as much. I've taken the vehicle to the dealer during the warranty, specifically for two issues covered under recall. I also regularly use their on-site instant oil change at the appropriate intervals. The dealer can see all the maintenence history in their system.

The vehicle started acting up and throwing codes about a week and a half ago. The codes pointed me toward a potential MAF sensor issue, a battery issue, and a couple of other codes related to those. Being out of warranty, I was ready to tackle this myself. But a new replacement battery and new MAF sensor didn't change those issues. And a test of the 'hot wire' (ignition on) at the MAF's vehicle side connector is 10.2 volts (when it should be 12 volts). So I sat down and started chasing wiring problems.

During a deep dive on the internet, I found two TSBs, one for a wiring harness issue, the other for a ground issue. The TSBs were released in March and July of 2022. Those TSB dates fall between the first and second recall visits to the dealer. It's a limited run of VINs, but my vehicle falls under those parameters (verified by the applicable VIN letter and the RPO Codes). The codes listed in the TSBs are synonymous with the codes on my vehicle. So any work done in relation to either of the TSBs back when the TSBs came out would have been covered by the warranty.

My thought process is that, at the appointment for the second recall issue, the TSB issues should have been addressed. And there's no mention of any harness inspection or ground wire inspection on any of the paperwork for the second recall issue or any subsequent paperwork.

I have an appointment at the dealer this coming week. The wiring harness is just shy of $500. And while all the signs and codes point to the wiring harness, I'm hesitant to buy it online if it ends up not being the issue. It could end up being the ground wire issue. Both jobs are less than an hour. Book time for the harness replacement is 0.3 hours, or 18 minutes, ground issue is 0.5 hours/30 minutes. That said, the parts that need to be removed to make these repairs are out of my comfort range. A large part of that is due to a lack of availability of a 'walkthrough' diagram or even a YouTube video.

Before the pile on regarding why I go to the dealer... other than the two recall issues, the vehicle has been very good to me. While the dealer's oil change prices are a hair higher than the competitive rates, my logic behind that is, by my paying that hair more at the dealer, there's only two 'people' working on this car. Myself, and the dealer. And this way there's also a record of oil change intervals. Granted, I may reassess all that if I need a repair that's out of my expertise and the dealer is significantly higher than an independent shop. But for right now, simply put, there's no wiggle room on the dealer's end that "the other place must have messed that up". I had that sort of thing happen back when I bought a used car, and that dealer was dodging responsibility like Neo. But that's another story for another time...

As far as the current TSB issue, I'd like to make my case for having the harness replaced at no cost to me.

If the dealer balks at that, my second suggestion would be to have the dealer pay for the harness and I would pay the labor.

Any ideas or suggestions for approaching the dealer would be appreciated.
 
Back
Top